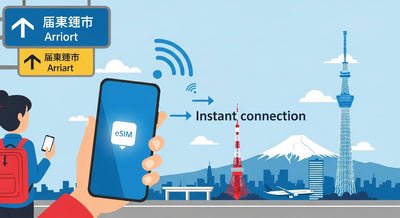
Landing in Japan soon? Don’t waste your first hours figuring out Wi-Fi or waiting in rental counters. This beginner-friendly guide will walk you step-by-step through setting up your Japan eSIM on iOS and Android, with screenshots and troubleshooting tips so you can connect instantly.
Why This Guide Matters
If this is your first time using an eSIM, you might feel overwhelmed. What’s a QR code? Do you lose your original SIM? How do you make sure roaming fees won’t pile up?
Don’t worry—this guide was written specifically for beginners who prefer a clear, follow-along walkthrough with visuals. Whether you’re on an iPhone or Android, you’ll be able to:
- Confirm your phone is compatible before departure
- Install and activate your Japan eSIM in minutes
- Switch smoothly between your home line (for calls/texts) and your Japan eSIM (for data)
- Troubleshoot common issues if something doesn’t work right away
By the end, you’ll not only be connected, but also confident about how your eSIM works.
Before You Start: Your Pre-Setup Checklist
Activating an eSIM is much easier if you prepare the essentials:
-
Confirm phone compatibility
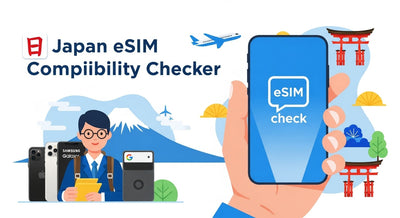
Not every phone supports eSIM. Apple, Google, and Samsung flagship devices usually do, but check first. Use our Japan eSIM Compatibility Checker to make sure your device is supported.
-
Connect to stable Wi-Fi
Activation requires an internet connection. Use your home Wi-Fi before departure or hotel Wi-Fi after arrival. Avoid unstable public hotspots.
-
Keep your primary SIM active
Most travelers keep their home SIM in place for calls or SMS verification (for banking apps, two-factor logins, etc.). Your Japan eSIM will handle data.
-
Have your QR code or activation details ready
Your provider will usually send this via email after purchase. Keep it open on another device or print it out for easy scanning.
Step-by-Step Walkthrough: iOS Setup
If you’re an iPhone user, follow these steps exactly. Screens may vary slightly by iOS version, but the process is consistent.
1. Open Settings → Cellular → Add eSIM
On some models, this is Settings → Mobile Data → Add eSIM.
2. Choose “Use QR Code”
Point your camera at the QR code provided by your eSIM provider. Alternatively, select “Enter Details Manually” if you have an activation code.
3. Label Your New Line
When prompted, label the new line something recognizable, like “JP-eSIM”. This will help you switch easily later.
4. Configure Data & Voice Defaults
- Cellular Data → Select JP-eSIM
- Default Voice Line → Keep as Primary (your home SIM)
This ensures you don’t accidentally make expensive international calls through the wrong line.
5. Enable Data Roaming
Go to Settings → Cellular → JP-eSIM → Data Roaming ON. Without this, you won’t have internet in Japan.
6. Enter APN (if required)
Some providers need you to manually enter the Access Point Name (APN). Instructions will be included in your purchase email.
7. Test Your Connection
Open Safari or run a speed test. If it loads, you’re all set.
Step-by-Step Walkthrough: Android Setup
Android menus differ by brand (Samsung, Pixel, Oppo, Xiaomi), but the process is similar.
1. Open Settings → Network & Internet → SIMs → Add eSIM
On Samsung, it may be Settings → Connections → SIM Manager → Add eSIM.
2. Scan QR Code or Enter Activation Code
Point your camera at the QR code provided by your eSIM provider. If you have only the activation code, select “Enter manually.”
3. Label and Set Preferred SIM
Label the new SIM as “JP-eSIM”. Then under Preferred Data SIM, choose JP-eSIM.
4. Enable Data Roaming
Go to Settings → Network & Internet → SIMs → JP-eSIM → Roaming → ON.
5. Enter APN (if required)
If your provider includes APN details, enter them exactly. Typos will prevent connectivity.
6. Test Your Internet
Open Chrome or Google Maps to confirm your connection is working.
Troubleshooting Checklist
Even if you follow instructions, sometimes things don’t connect right away. Here’s your quick fix flow:
- No data at all → Confirm that Data Roaming is ON for JP-eSIM.
- Still offline → Toggle Airplane Mode for 10 seconds, then switch back.
- Check APN → Ensure APN settings match the provider’s instructions.
- Reboot your device → A restart often solves lingering issues.
- Full guide → If issues persist, follow our Complete Troubleshooting Checklist.
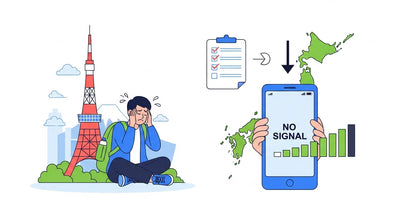
💡 Tip: Many “problems” are actually due to weak signals in subways, basements, or mountains. Test again in an open area before assuming it’s a setup issue.
After Your Trip: What to Do with Your eSIM
Once your Japan trip ends:
- Disable the Profile Go to Settings → SIMs → Toggle OFF JP-eSIM.
- Remove the Profile (optional) If you want to free storage or avoid confusion later, you can delete it entirely.
- Check Reuse or Top-Up Options Some providers allow you to reload your eSIM for future trips instead of buying a new one.
Extra Resources to Maximize Your Experience
- Save Data Abroad → Smart Settings for Maps, Translate, and Video
- Compare Plans Before Buying → Plan Comparison Page
- Got Questions? → FAQ Page
Visuals to Include
This guide is designed for visual learners. Adding these will make setup foolproof:
- iOS screenshots: every step from “Add eSIM” to “Data Roaming ON”
- Android screenshots: Samsung and Pixel variations of the SIM Manager menus
- Troubleshooting diagram: A simple flowchart (Data Roaming? → Toggle Airplane Mode → Check APN → Reboot → Contact Support)
Final Thoughts
Using an eSIM in Japan is the simplest way to stay connected without renting a Pocket Wi-Fi or swapping physical SIM cards. Once installed, you’ll enjoy:
- Instant connectivity on arrival
- No extra devices or batteries to carry
- Flexible data plans tailored to your trip length
- Peace of mind with 24/7 online support
With this guide, you now have the confidence to set up your Japan eSIM smoothly.
Make Your Japan Trip: Save Smart. Connect Fast.
The real strength of JP-SIM.com is not only its simplicity and convenience, but also its outstanding affordability compared to other options.
No more waiting in long airport lines for a SIM card or carrying a heavy pocket Wi-Fi. With JP-SIM, you can purchase online before departure, scan the QR code, and get connected the moment you land in Japan.
JP-SIM is significantly cheaper than roaming and many competitor services, while still offering flexible plans that match your travel days and data needs. Powered by Japan’s major carrier networks, it provides reliable high-speed coverage across the country—from Tokyo and Kyoto to Hokkaido and rural areas. And with 24/7 multilingual support, even first-time visitors can travel with confidence.